

DIY Auto Detailing: How to Properly Hand Wash & Polish Your Car
 It happens almost as soon as you drive your car off the lot: by the time you get home the paint already looks worse. After some more time, dirt and grime build up and the car needs a wash. So, you grab the bucket and the sponge and toil away. After finishing, you see streaks and marks; you’re convinced that your car will never look as shiny and vibrant as the first time you drove it. The truth is that is won’t—not if you keep washing it incorrectly. With the right technique, you can wash and polish your car without a trip to a professional or purchasing expensive equipment. Follow these steps to get the best look possible:
1. Wash at the Right Time
The paint should be cool when you start washing. This means not washing soon after driving and waiting until the day cools off. Otherwise, water will flash-dry and leave patches.
2. Get the Right Equipment
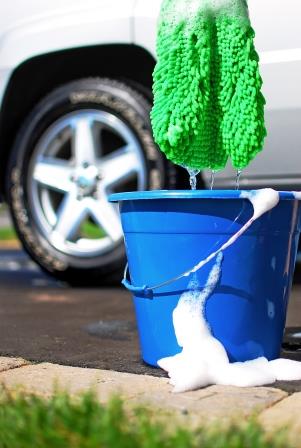
The trusty bucket and sponge combination will serve you well, provided they have been cleaned well. Ideally, have two; one with soap and one with normal water to rinse the dirt off into. You should also get a car-washing, microfiber mitt, which come cheap from any auto supply store. You will probably also need a good brush. These allow the tough and hard to reach angles to get as clean as everything else.
Do not use dish soap, as this can remove car wax along with dirt. Instead, buy soap specifically made for washing cars. You should also be using clay and polish made specifically for car detailing. These should also be available at most auto part stores.
3. Start with the Wheels
Starting with the wheels guarantees that wheel grime does not fly up and ruin the newly-washed body. Make sure that you know what finish your rims have before using product on them. Chrome, aluminum, and standard clear-coating all require different chemicals with different levels of abrasion.
4. Wash One Panel to the Next
Take the sponge and mitt, using them where needed depending on the contour of your car. Start at the top of the car and move to each distinct panel. These panels include the hood, trunk, and body segments. Wash each one with soapy water and rinse them off completely before moving to the next segment.
5. Drying the Car
 Use the hose to spray the entire vehicle in an even mist. Yes, get the body wetter before you dry it. Though counterintuitive, it will yield a better result. Then, use the microfiber towel to blot the car dry in as few blots as possible.
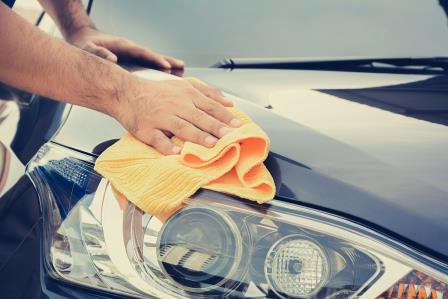
Do not let your car air dry. Allowing the sun to take care of this step makes the dry uneven and leaves water spots all over the car. It is recommended that you use a microfiber towel for this step. Using normal household towels often leaves fine strands of fabric on the car, undoing all the work you just put into washing. A microfiber towel is more absorbent, does not leave this residue, and is gentle on the finish.
6. Break out the Clay
Clay specifically made for car polishing leaves the finish smooth to the touch. Most clay kits come with lubricant; apply this to the clay first and then on the car. Begin rubbing the clay against the car in light motions. If the clay changes color, fold it and use the light side again. By the end of this, the car should feel smooth like glass.
7. Apply the Polisher to Specific Areas
Once the car feels smooth, you can begin polishing out defects and marks. For marks, apply the polisher to the clean rag used if polishing by hand. A dual-action polisher is safe, easy, and will save a lot of time. You can polish by hand if you are not afraid of adding extra work. Apply in small areas at a time, focusing where marks and damage appear most. After no longer than a minute, wipe off while still wet. Do not be afraid to throw some elbow grease into it.
8. Finish Polishing
To finish, apply polish across the rest of the car in small areas. Work it off lightly with less force this time and remove each area while still wet before moving on. By the end, the car should appear glossy and vibrant.
With the proper time and technique, washing a car can revitalize it and make it look like new again. If desired, adding wax after polishing can make the vehicle stay brilliant longer. With a bit of targeted effort, your car can be something worth being proud of when you drive it. These steps will help you get the best results at home.
Do not use the same rag or mit on the wheels and body. Do the body first then change rag, sponge or mit to wash the wheels. Getting wheel dust from the brake pads on the body will ruin a finish.
Any suggestions for those of us that have well water with excessive calcium that spots the vehicle? Besides of course, a several thousand dollar retrofit of household media tanks, water softner, etc,
Hi Hal, we recommend trying a compound and polish such as our 3 steps 303® Compound, 303® Polish and 303® Finishing Polish.
Hi Hal, we recommend trying a compound and polish such as our 3 step 303® Compound, 303® Polish and 303® Finishing Polish.
Just go to a local car wash. There are several in all areas that I know of that are just an open area with a hose for you to handwash your vehicle. Bring your personal polisher etc with you.
I don’t where you live but I live in the Sierra foothills and the nearest carwash is 40 miles one way. I owned an auto body repair business for many years, I wash the wheels with seperate cloth to keep any contamination from getting on the finish. I start with a good rinse, the I start with the top 1/3 all the way around, then the next 1/3 same way and the bottom last because more dirt and abrasives are usually lower, rinse the mit each time before putting it into the bucket for more soap, keeping the abrasives out of the wash bucket. The best polisher to use is a Flex, they are the pro choice because of their gear driven orbit.
Any suggestions for those of us with calcium in our domestic well water short of spending thousands for water conditioning equipment ?
we recommend trying a compound and polish such as our 3 step 303® Compound, 303® Polish and 303® Finishing Polish.
The blog is really informative, thanks for sharing the article.
Your steps above are very confusing. You say ” 3. Start with the Wheels
Starting with the wheels guarantees that wheel grime does not fly up and ruin the newly-washed ( when was the car washed if we’re starting with the wheels? ) body. Make sure that you know what finish your rims have before using product on them. Chrome, aluminum, and standard clear-coating all require different chemicals with different levels of abrasion.
I believe that it’s a great idea to completely rinse the car of all the grime you can before you even touch the car with any washing implements. Additionally I use two wash basins, one for wheels and lower rocker area and the other for the rest upper parts of the car. I do not was in the sun, flash drys! I have my garage set up to wash. When washing, even in the garage, I keep the entire car wet so the water doesn’t have a chance to dry even a little, that will leave a hard water ring. Follow the car lines when you wash, no swirling and keep rinsing the micro fiber mitt. Dry the car completely, even with hard water a complete dry will stop the mineral deposits. Finally return to the car often to dry the drips, they are a nuisance. You could use a air compressor blow gun to help expel the water from the crevasses. My last tip, if you drive away after drying your car bring a towel with you, then stop after you drive a short distance and dab the water from the crevasses. Careful with this extra step, dirt could stick to it like glue….bring a detailer spray too.
I find the best way to avoid streaks while drying my
Black 58 Vette is to do all of the above but after misting
The car I dry it off using a leaf blower. No streaks from a microfiber day.
I like to take the nozzle off the hose &rinse the car with the hose. The water sheets off if you have any wax on the car. It makes it easy to dry with a micro fiber towel.
I agree. Do wheels and tires first then dump bucket add fresh car wash then do body.
… blot the car dry in as few blots as possible.
Blot?
Ordinary rubbing with microfiber cloth not recommended?
I have found the second bucket can be eliminated if a “grit guard” is in the bottom of the soap bucket. It traps the grit and foreign particles that fall from the mitt.
Also, I highly recommend using a high powered blower to dry the car before using a micro fiber towel. It pushes the water off the car and drives it out of the crevices preventing corrosio
Thanks a lot for sharing your incredible ideas. It is an appreciated and pretty tip for all those music lovers. What a Fatal post for those who want to upgrade exist subwoofer with new one.